An independent biomedical engineering project
What if a cup could adapt to hand tremors?
After observing a Parkinson’s patient struggle to drink water during my hospital internship, I wondered whether a cup could move with someone’s hand while keeping the drink more stable. That question led me to design and 3D-print ParkiCup, a cup holder with two interconnected rings that move independently.
Designed and built by Selin Yıldız
From an Idea to a Working PrototypeSee how I built it ↓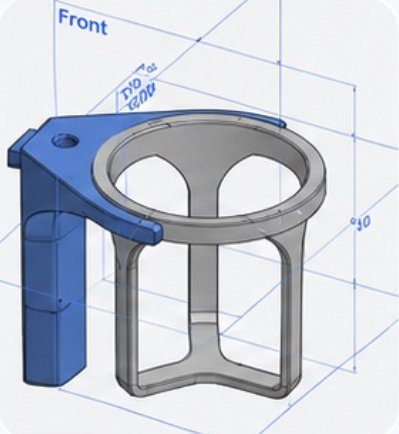 1. CAD
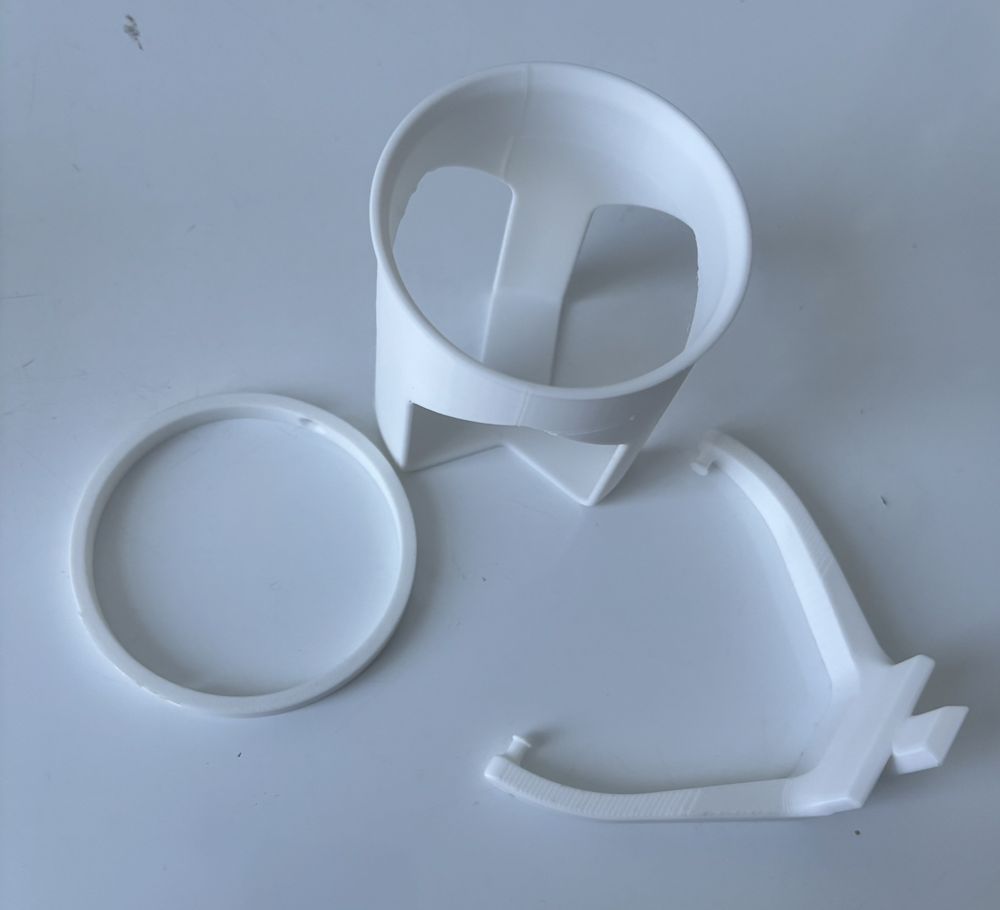 2. First print
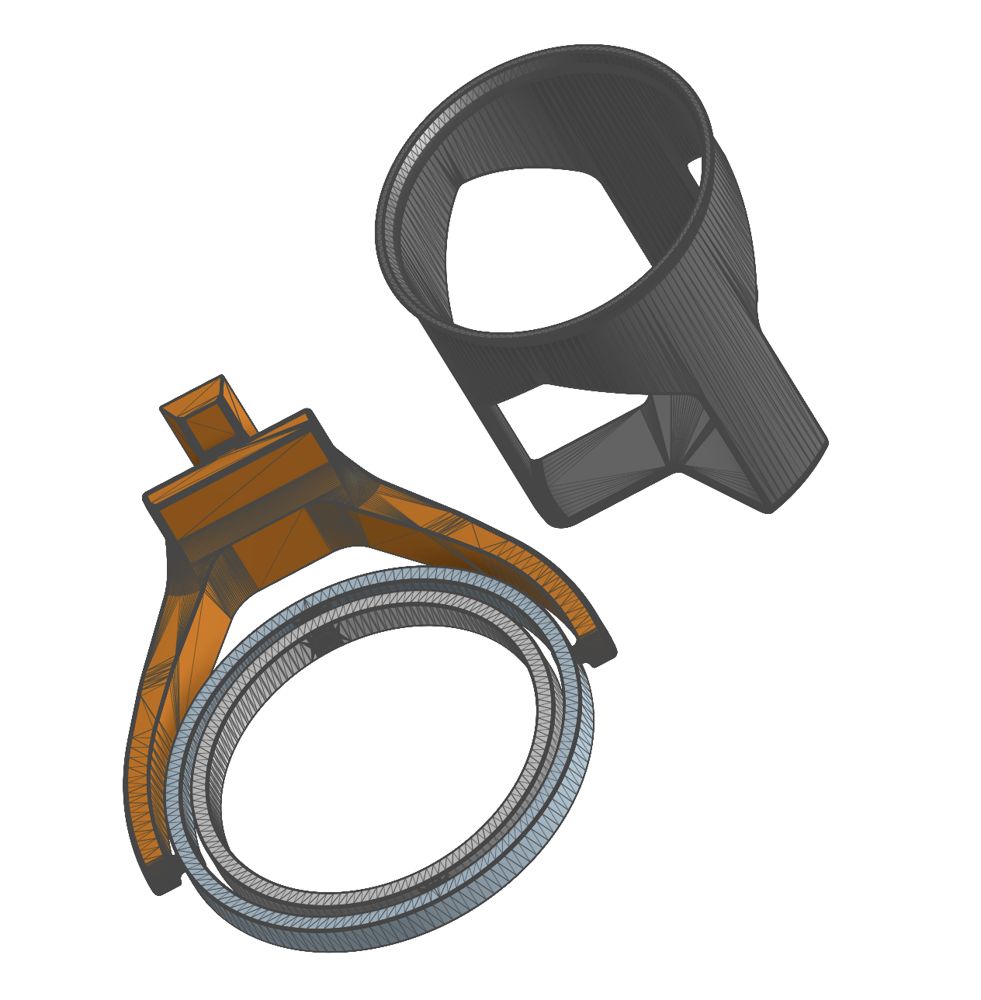 3. Redesign
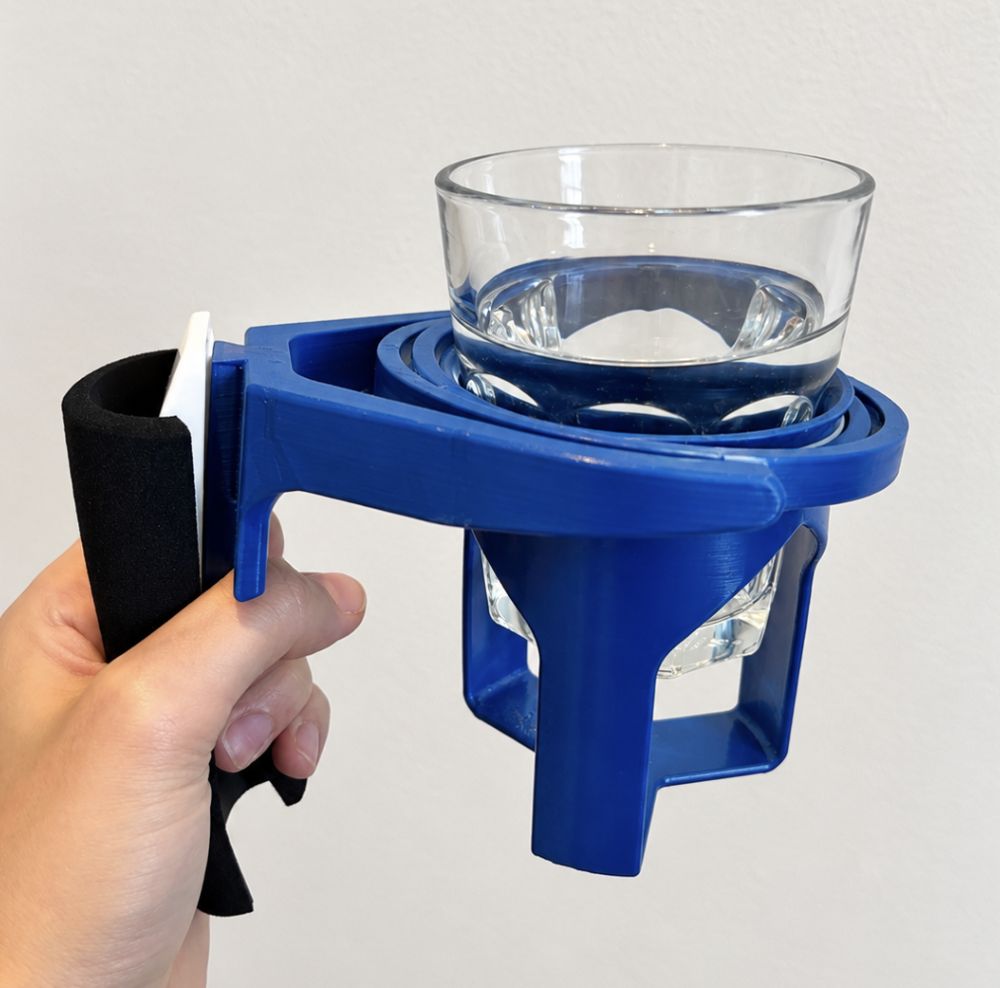 4. Final
Want to print your own ParkiCup? I’m happy to share my 3D-printing design files so you can make one yourself. Just reach out! parkicup.project@gmail.com
See ParkiCup in action
I filmed this 52-second demo in my school’s makerspace to show how the two rings move when the handle tilts. Subtitles included.
Key experiment
ONiLAB rocking shaker experiment
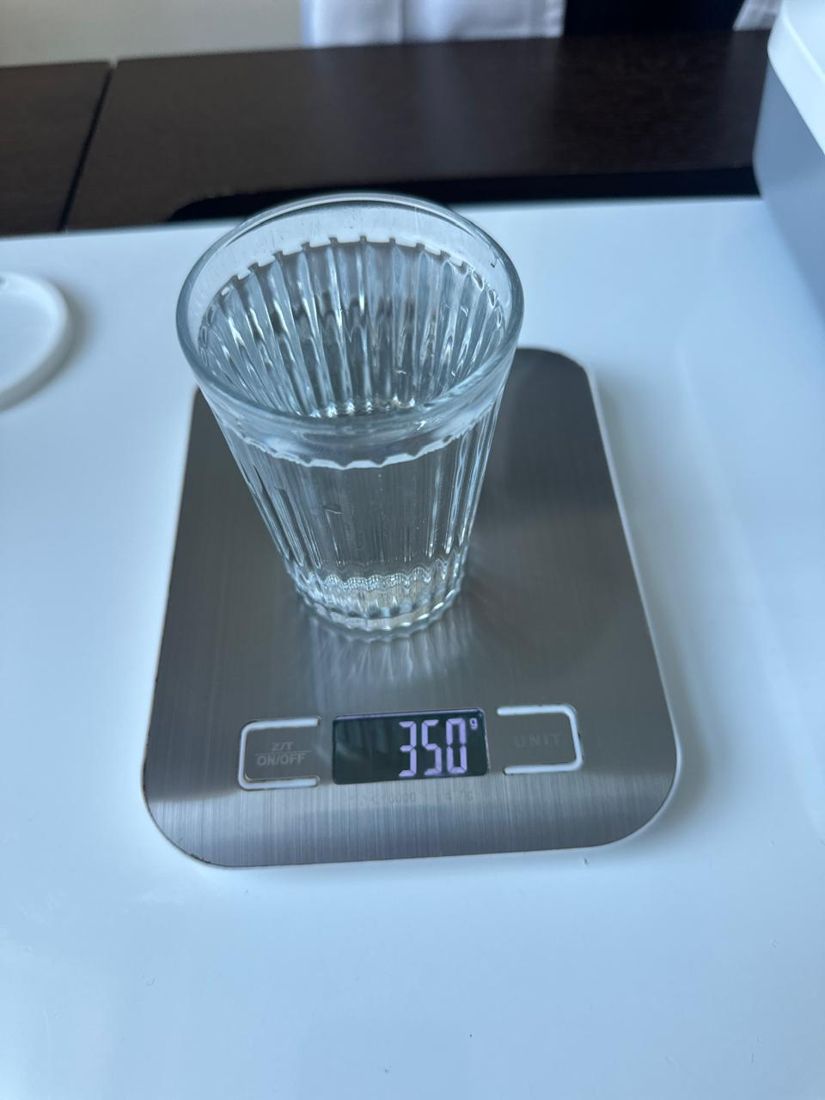
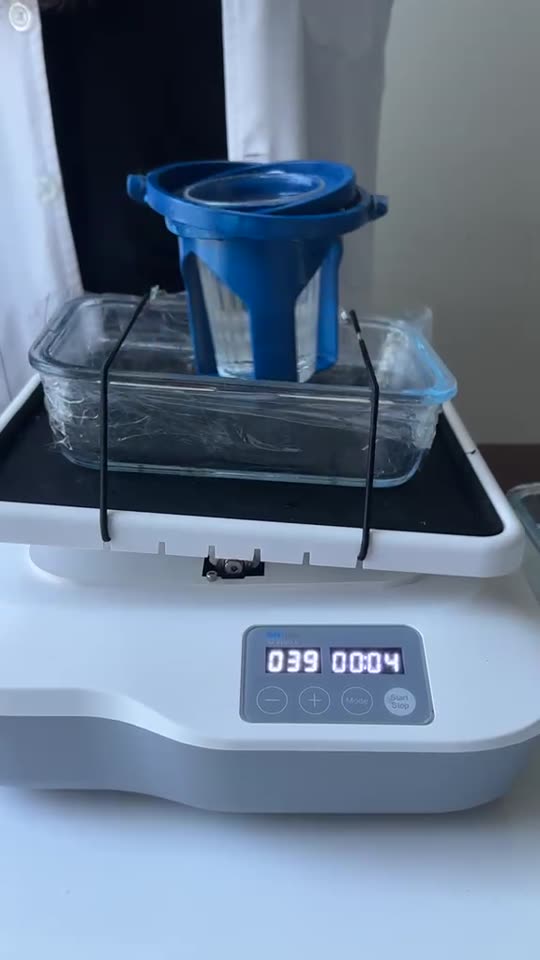
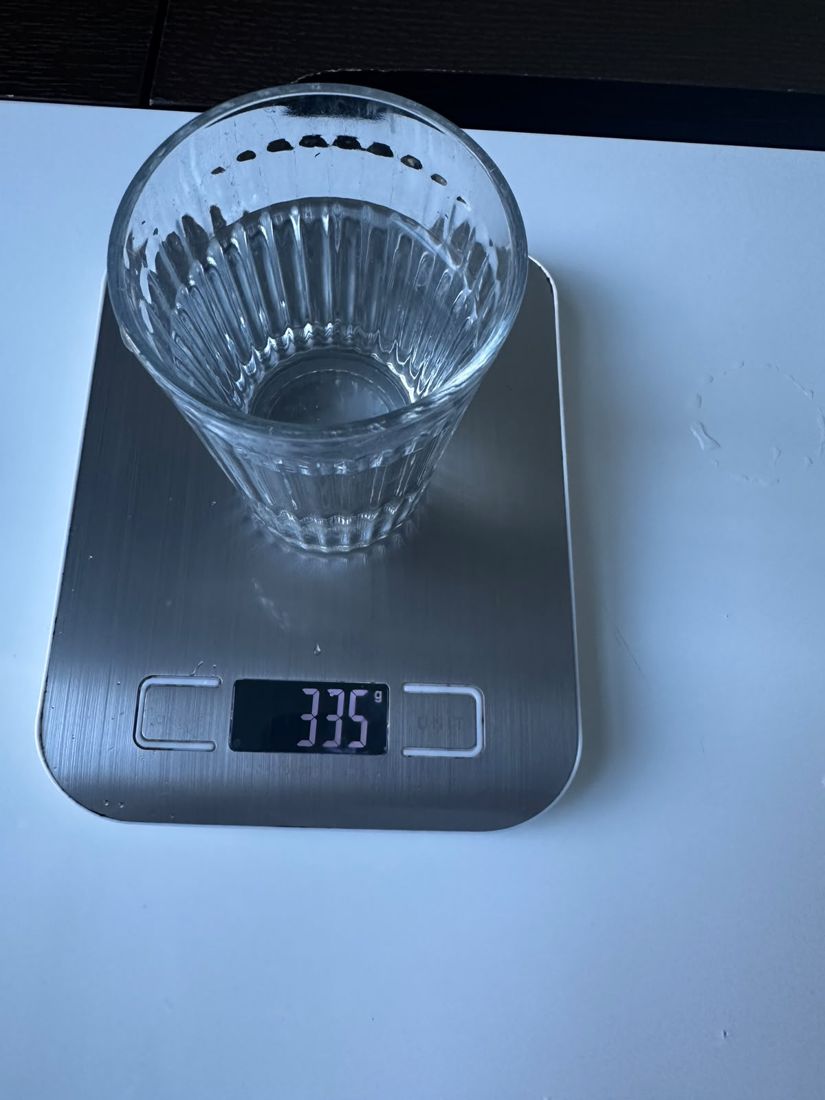
Shaking by hand is never the same twice, so I used a lab rocking shaker to compare a regular glass with the same glass inside ParkiCup under identical, repeatable movement. I ran it in the laboratory of the hospital where I did my internship.
Watch a test run
In this video I walk through my setup and explain how I ran the test on the ONiLAB rocking shaker, comparing the regular glass with ParkiCup.
Results
| Rocking speed | Regular glass: water spilled | With ParkiCup: water spilled | Difference |
|---|---|---|---|
| 10 RPM | 0 g | 0 g | No spill in either |
| 20 RPM | 0 g | 0 g | No spill in either |
| 30 RPM | 0 g | 0 g | No spill in either |
| 40 RPM | 0 g | 0 g | No spill in either |
| 50 RPM | 20 g | 0 g | 100% less |
| 60 RPM | 35 g | 0 g | 100% less |
| 70 RPM | 48 g | 5 g | 90% less |
| 80 RPM | 55 g | 15 g | 73% less |
Limitation: even at 80 RPM the platform rocks about 1.3 times per second in one direction, slower and simpler than a Parkinson’s tremor (around 4 to 6 per second). This is an early mechanical comparison, not proof that ParkiCup helps people with tremor.
1 · The Idea
It Started With a Glass of Water
During my neurology internship, I watched a Parkinson’s patient struggle to drink a glass of water because of his hand tremor. Something most people do without thinking required considerable concentration, and sometimes help from another person.
I began wondering whether I could design something that adapted to his movements instead of asking him to resist them.
What already exists: 5 tools I researched (tap to expand)
Before designing anything, I researched the tools people with tremor already use.
Weighted utensils
Added mass slows and dampens hand movement.
Trade-off: The extra weight can be tiring to hold.
Built-up handles
A thicker, softer grip is easier to hold.
Trade-off: Helps grip, but the cup still moves with the hand.
Swivel mechanisms
A pivot keeps a spoon level as the hand turns.
Trade-off: Usually works on one axis only.
Wearable stabilizers
Worn on the hand or wrist to resist shaking.
Trade-off: The whole hand’s movement is restricted.
Active tremor cancellation
Sensors and motors move the tool against the tremor.
Trade-off: Needs batteries and electronics, and adds weight and cost.
What interested me
Could a passive mechanical design allow a person’s hand to move while helping keep the glass upright?
Most of the tools I found try to dampen, resist or actively counteract the tremor. I became interested in self-leveling cup holders, like the ones used in cars and boats, and in gimbal mechanisms, which keep an object upright using pivots and gravity.
Similar gimbal-based designs, including patented ones, existed before ParkiCup. I didn’t invent gimbal stabilization. ParkiCup is my own independent attempt to understand this mechanism, build it, and find out where it works and where it doesn’t.
Sources I used
- Deuschl G, Bain P, Brin M. Consensus statement of the Movement Disorder Society on tremor. Movement Disorders. 1998;13(Suppl 3):2-23.
- Jankovic J. Parkinson’s disease: clinical features and diagnosis. J Neurol Neurosurg Psychiatry. 2008;79(4):368-376.
- Pathak A, Redmond JA, Allen M, Chou KL. A noninvasive handheld assistive device to accommodate essential tremor: a pilot study. Movement Disorders. 2014;29(6):838-842.
- McGruder J, Cors D, Tiernan AM, Tomlin G. Weighted wrist cuffs for tremor reduction during eating in adults with static brain lesions. Am J Occup Ther. 2003;57(5):507-516.
- Hewer RL, Cooper R, Morgan H. An investigation into the value of treating intention tremor by weighting the affected limb. Brain. 1972;95(3):579-590.
2 · Design & Build
From an Idea to a Working Prototype
How ParkiCup works
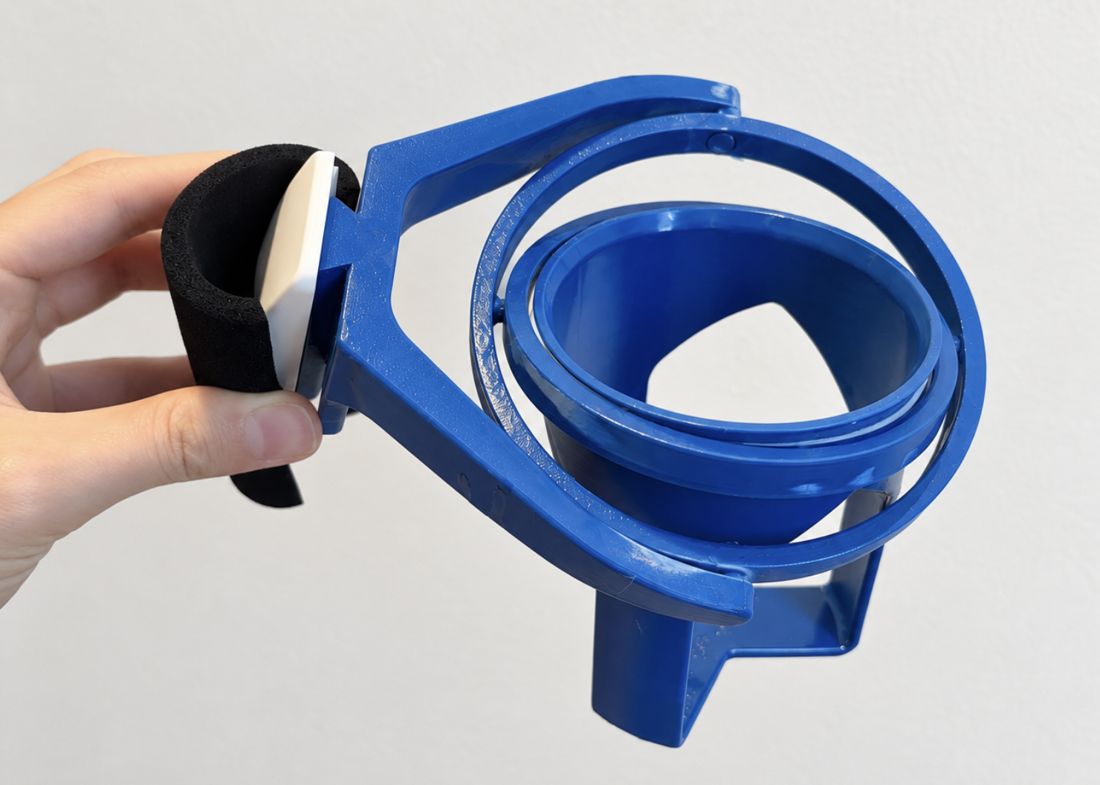
When I tilt the handle, the two rings rotate at different angles and the cup holder keeps hanging downward.
ParkiCup uses two connected rings that rotate along different axes. When the handle tilts, the rings allow the glass holder to move independently, helping the glass remain closer to upright.
It doesn’t stop a tremor or keep the glass perfectly still. It is designed to reduce how much the glass tilts with the hand.
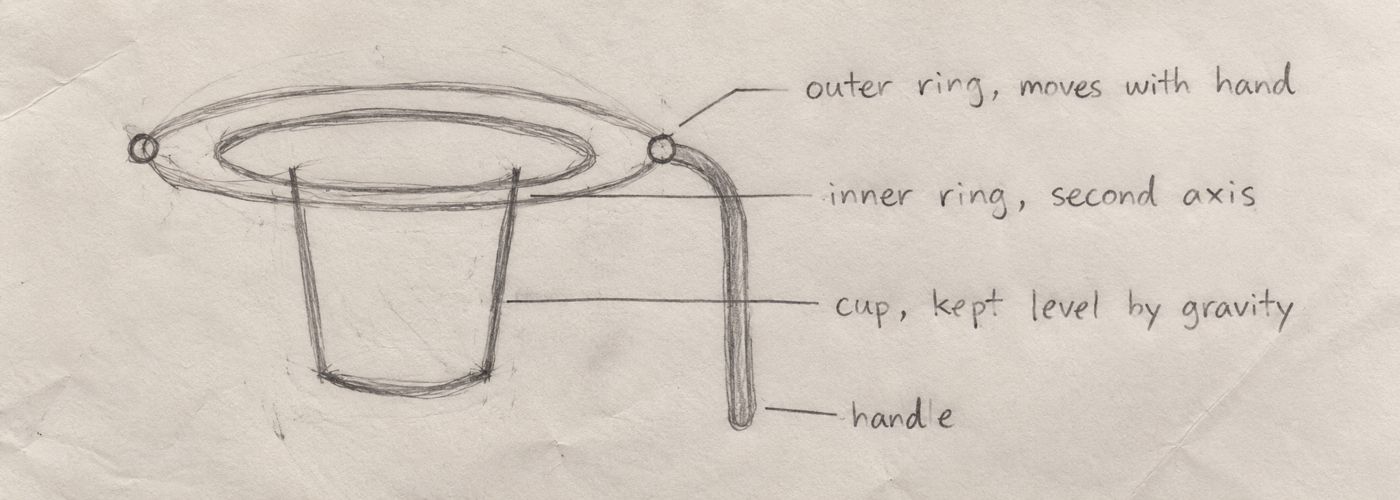
My hand-drawn diagram of the mechanism.
Exploring ideas on paper
I sketched different versions on paper to compare them: three rings, three rings with a weight at the bottom, and three rings with magnets at the bottom.
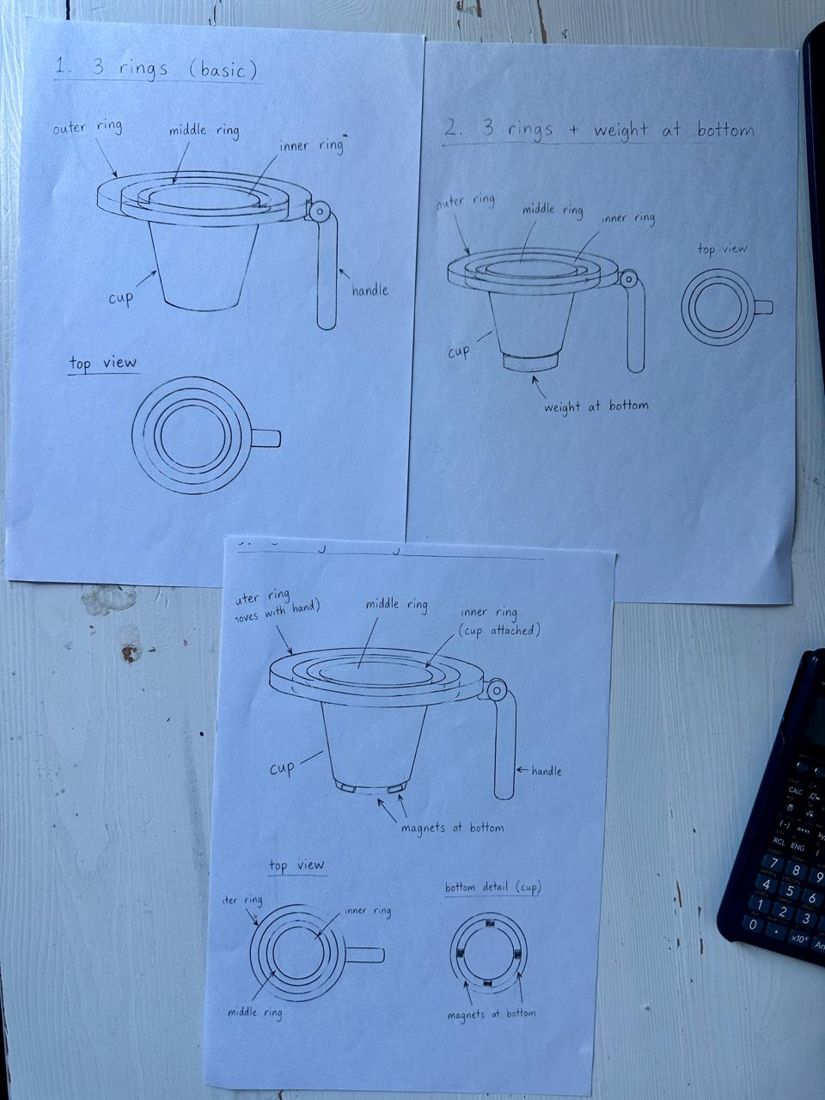
Three concepts: basic, with a weight, and with magnets at the bottom.
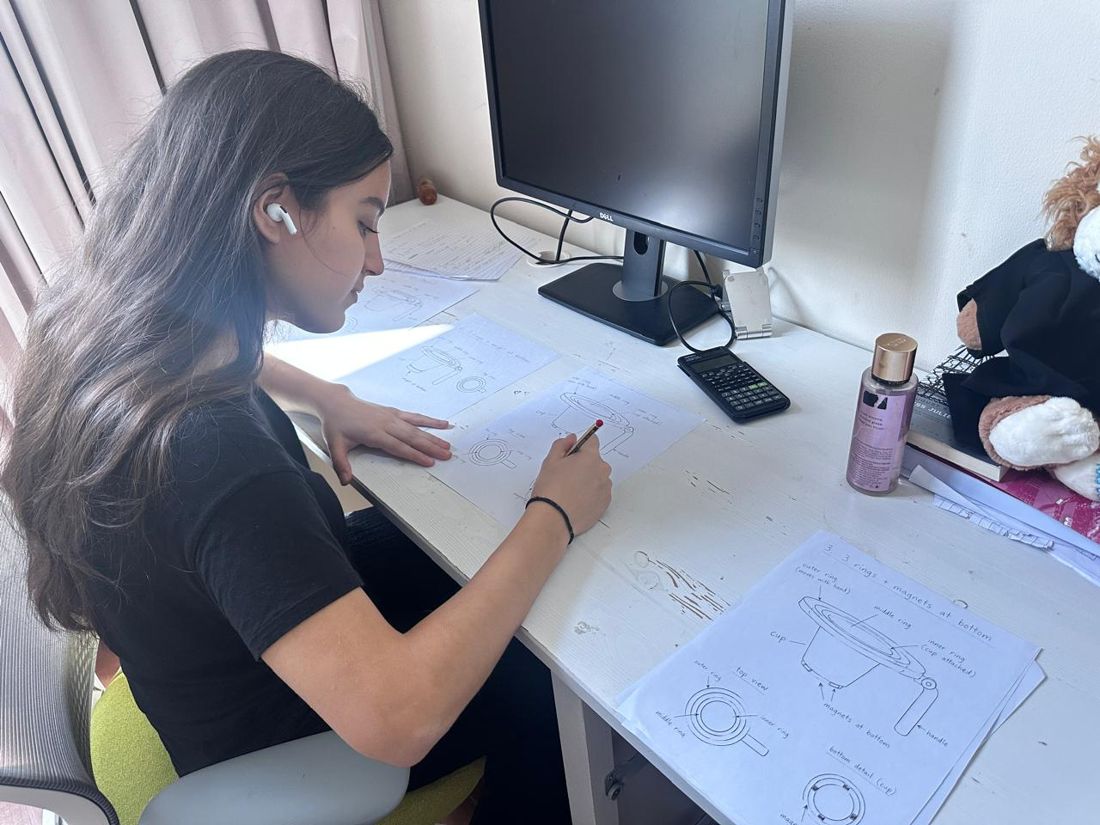
Working through the concepts at my desk.
CAD and 3D printing
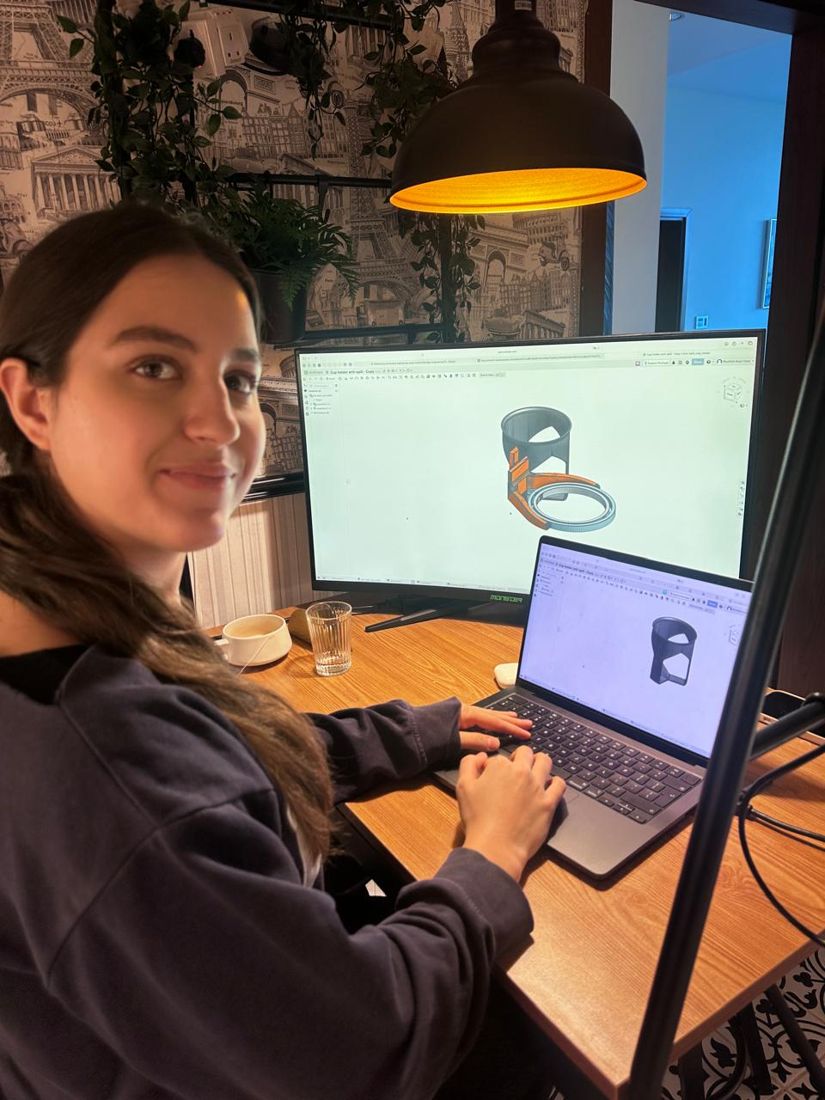
Me working on the design in Onshape.
The initial Onshape design: frame, handle and cup holder.
The redesigned parts in CAD: handle frame, outer and inner rings, and cup holder.
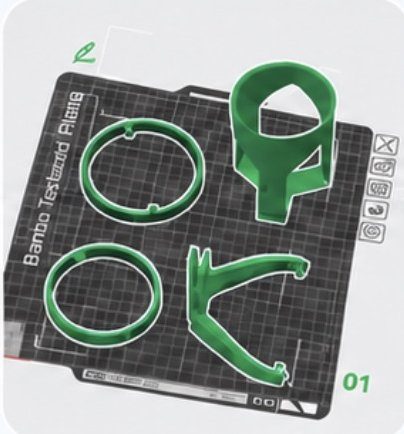
Preparing the parts for printing, rings laid flat.
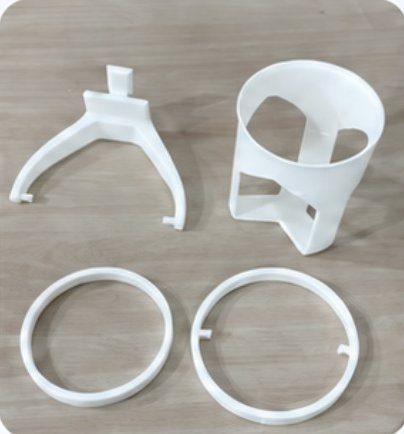
Printed components before assembly.
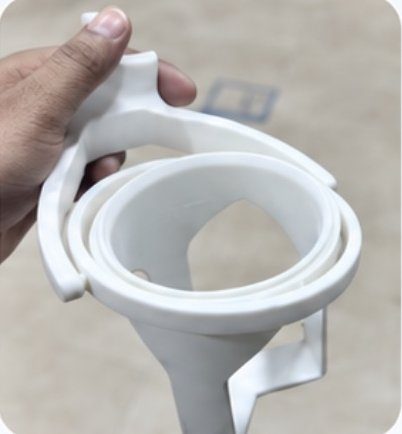
The assembled white prototype.
Development timeline
How ParkiCup changed from May 2025 to September 2026, including the version that didn’t work.
May 2025
Designing it in Onshape
I modeled my initial two-ring mechanism in Onshape.
What changed: I wanted the user’s hand and the cup to have some independence from each other, which led me to a two-ring design.
July 2025
Printing each part separately
I printed the rings flat so they would stay round. The fit between them decided how freely the cup could move.
July 2025
First prototype: not stable, and too small
When I put my first prototype together, the cup could fall out, and it was too small to hold the glass securely.
What changed: I went back to the CAD model instead of trying to patch the print.
October 2025
Second prototype: printing the rings together
For my second prototype I printed the rings together instead of as separate parts.
January 2026
Assembly
I assembled the printed frame, rings and cup holder into the white prototype, which I then load tested.
September 2026
Final prototype: blue version with a foam grip
The final blue prototype has a foam grip on the handle.
What changed: After a printed part broke when I dropped it, I switched from PLA to PETG for later prints.
Engineering decisions
Why two rings?
I wanted the user’s hand and the cup to have some independence from each other. Two rings that rotate on different axes let the holder respond to the hand while the glass hangs closer to upright.
Why was the first prototype unstable?
It was too small, and when I assembled the separately printed parts the cup could fall out.
Why did the ring printing change?
For the second prototype I printed the rings together instead of as separate parts.
How was it assembled?
The printed frame, rings and cup holder were assembled into the white prototype, which I then load tested.
Why PLA, then PETG?
My first prints were PLA, which is stiff and snapped when I dropped it. I switched to PETG, which can bend slightly before breaking.
What changed in the blue prototype?
It has a foam grip on the handle.
3 · Testing & Results
Testing My Design: Does It Actually Help?
Building ParkiCup was only part of the project. I also wanted to understand what worked, what didn’t, and whether I could measure the difference.
All tests at a glance
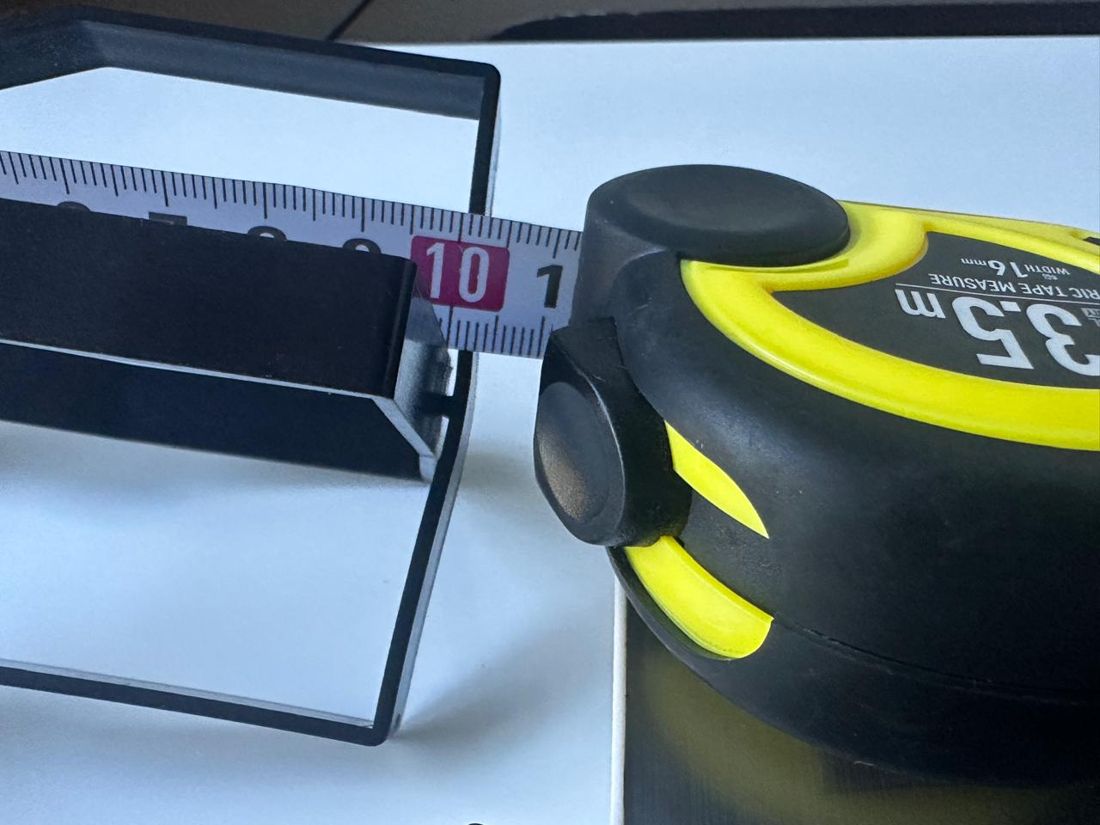 Load testAdded weight in 100 g steps until the inner ring bent at about 900 g.
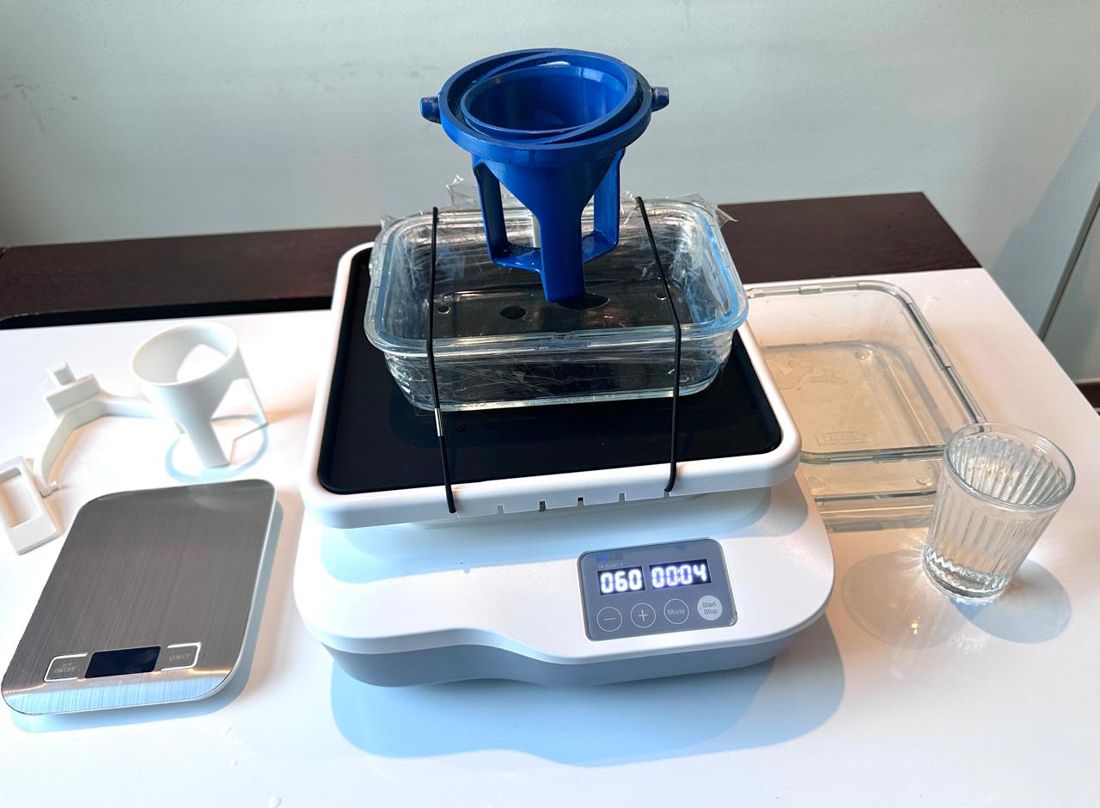 ONiLAB rocking shaker test See the experiment ↑Rocked a glass at 10 to 80 RPM for 60 seconds, with and without ParkiCup, then weighed the spill.
LOAD TEST
Weight added in 100 g steps, each held about 30 seconds.
≈ 900 g
The inner ring bent about 2 mm. It’s the weakest part, so the next version needs a stronger ring.
4 · What I Learned
What Failed, What I Learned, and What’s Next
Three failures that shaped the design
Failure 1
The first prototype was unstable
What happened: My first version, printed as separate parts, was too small and unstable. The cup could fall out.
What I learned: Size and fit mattered as much as the two-ring idea itself.
What I changed: I redesigned it and printed the rings together for the second prototype.
Failure 2
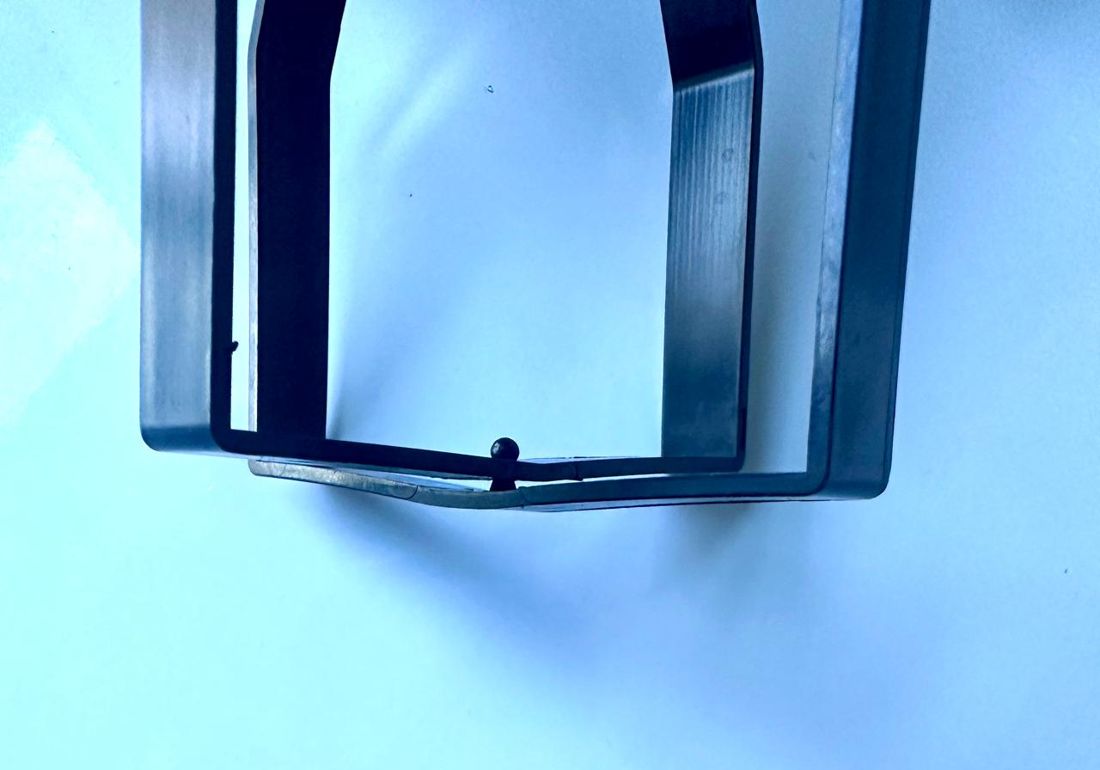
The inner ring bent during load testing
What happened: At approximately 900 g, the inner ring began to bend by about 2 mm.
What I learned: The inner ring is the weakest part of the structure.
What I changed: This is my top priority for the next version: stronger ring geometry or material.
Failure 3
A printed part broke when I dropped it
What happened: The thin supports at the bottom were printed in PLA. When I accidentally dropped ParkiCup from a very low height, they snapped.
What I learned: PLA is stiff, so it cracks instead of bending. Something used every day will get bumped and dropped.
What I changed: I switched to PETG, which can bend slightly before breaking. I haven’t re-tested drops yet, so I can’t say how much tougher it is.
What I want to improve next
1
Stronger inner ring
Explore different materials or ring geometries.
2
Lighter and more comfortable
Reduce weight without losing strength.
3
Easier drinking
Explore a thumb-operated lock so the user can tilt the glass on purpose while drinking.
4
More realistic testing
Test with movements closer to real tremor and, eventually, carry out properly supervised testing with users.
More ideas I want to explore
- Test different ring diameters, pivot positions and ranges of movement.
- Build a motorized simulator that can reproduce different tremor frequencies and amplitudes.
- Support different glass and cup sizes.
Reflection
When I started ParkiCup, I thought engineering was mainly about finding a solution that worked. But the unstable first prototype, the bent inner ring, and the broken printed component taught me something different.
Each problem helped me understand the design better and gave me another question to investigate.
I realized that engineering is not just about creating something. It is also about testing your assumptions, recognizing limitations, and being willing to redesign.
What ParkiCup cannot do yet
- I have limited experimental data so far.
- ParkiCup has no clinical validation.
- The current prototype is relatively bulky.
- It supports one glass size.
- Comfort during longer use hasn’t been evaluated.
- My tests don’t accurately simulate real Parkinsonian tremor.
ParkiCup is an experimental student project, not a clinically validated medical device.
5 · Print Your Own
Want to Make Your Own ParkiCup?
I’m happy to share my 3D-printing design files with anyone interested in making their own ParkiCup, experimenting with the design, or finding ways to improve it.
Just send me a message!
Email: parkicup.project@gmail.com
ParkiCup is an experimental educational prototype and is not a clinically validated medical device.
Request 3D Printing Files
This opens your email app with your message ready to send to parkicup.project@gmail.com.

6 · About Me
Hi, I’m Selin.
I’m a high school student interested in where medicine, neuroscience, and engineering meet.
My experiences during a neurology internship made me curious about how engineering could help solve everyday challenges faced by people with neurological conditions.
ParkiCup gave me an opportunity to explore that curiosity independently: from identifying a problem and learning CAD to building, testing, and redesigning a physical prototype.
I hope to continue combining engineering and medicine at university.